AO2 - Creative Making
Throughout this project, I have used a variety of creative methods. It was important to me that the magazine was striking an had a variety of colour, texture and shape to keep the reader interested. For a few outcomes, I combined a variety of physical techniques to continue to develop the initial outcome.
For example:
I started with a secondary source image. From this, I created a mono print using black ink onto newsprint paper.
-
Ink up an acrylic sheet ensuring a thin, consistent layer
-
Lay the sheet of plain paper onto the ink
-
Lay the image on top of the plain paper.
-
Trace around the image with a pen to transfer the ink.
-
Peel off the image and paper off of the ink.
This process took a couple of attempts to perfect. I found I only needed a very small amount of ink to avoid blurring of the lines and excess ink within the negative space.
Next, I photocopied the mono print onto pink card. Then finally, I coloured the imagine in using posca pens. I used a variety of bold, vivid colours that complimented the pink background.
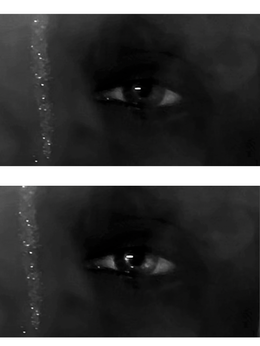
Photography and Photoshop became a big part of the magazine. Several of the pages in the magazine include photos I have taken and then edited in Adobe Photoshop.
First, I applied the desired makeup on the model. I chose to do dark makeup around the eyes so that the eyes would really pop after editing.
I then laid the model down, ensuring that they were comfortable. I laid them on a dark blanket to achieve a dark background that the smoke would stand out on.
I then positioned a smoke machine on the floor a few meters away from the model.
Smoke was activated and as it came into the frame, I took multiple shots very quickly.
Then, I edited the imagine in Adobe Photoshop using the following method:
1. Edit image to back and white
2. Brightness to -33
3. Contrast to 100
4. Levels to 2 & 229
5. Curves to - Input:106 - Output:175
6. Shadows to - Amount:0% - Tone:0% - Radius:0%
7. Highlights to - Amount:34% - Tone:100% - Radius:43%
8. Dodge Tool to enhance the highlights in the eyes
9. Create new layer > Use quick selection tool to select the iris of the eye > Colour blue using bucket tool > Overlay

Makeup Spread
For this effect, I scanned in some organza fabric and used Photoshop to overlay it onto my primary source image.
Textile Waste Spread
For this image, I used blue tac to secure some miniature figures to the inside of a jean pocket. The proportions of the figures next to the clothes make it look as though workmen are tryin to mine their way through an excess of textile.


Evolve Spread
This is a reduction lino print. Printed on unwanted woven fabric.


